常田です。
今年もっともホットなキーワードの1つはDockerだったに違いありません。
どこもDocker一色なのですがIBMからサービスが発表されました。それもBluemixから出てきました。もともとdotCloud(PaaS)ではじまったDockerですのでBluemixから出てくるのも自然なのかもしれません。
今回は、IBM Docker Container β版が利用開始出来るようになりましたのでアカウントの作り方からコンテナを実際に起動するところまでをご紹介したいと思います。この内容はだれでも利用可能なので興味があるかはBluemixを是非試してもらえればと思います。
目次
IBM Container (Bluemix) 環境の用意
Bluemixを利用するためにはIBM IDが必要となります。
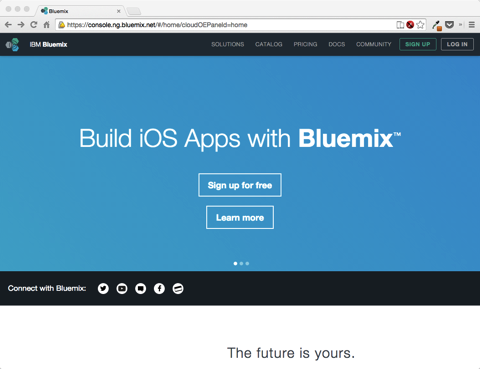
早速IDを作ります。
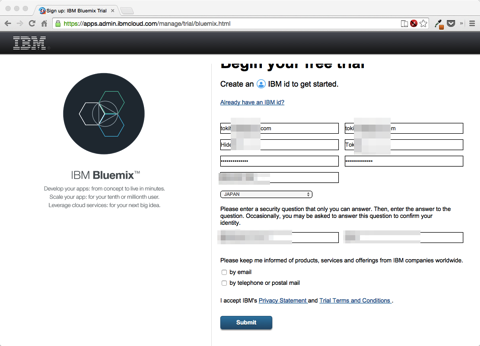
相変わらず?確認メール届くの遅いです。すでにIBM IDを持っている場合にはBlumixのIDとしてひもづけるようです。暫く待つとメールが届くので記載されているURLをクリックすれば利用することが出来ます。
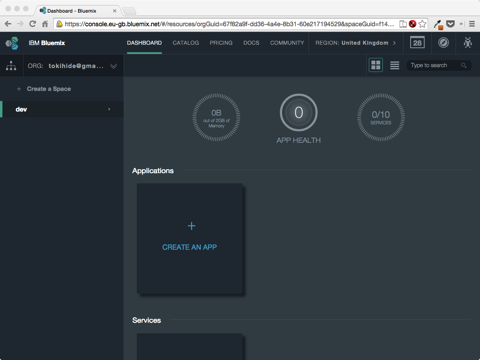
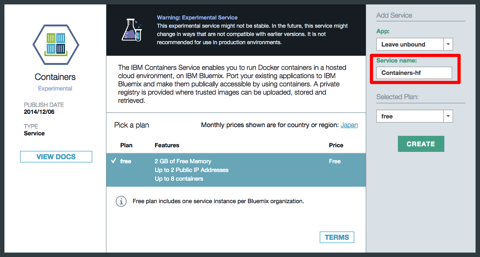
次にDockerContainerを探すために「カタログ」→検索BOXに「Docker」と入力して「Return」キーを打ちます。すると「Containers」というアイコンが検索されます。

Service-Nameの箇所は適当な名前に変更して「Create」をクリックします。
数秒で次の画面が表示されます。くじらさんが見えますね。そして暫くの間まてと書いてあります。Dockerが導入し終わったらメールが届くと書いあるのでサーバのプロビジョニングが行われているものと思われます。
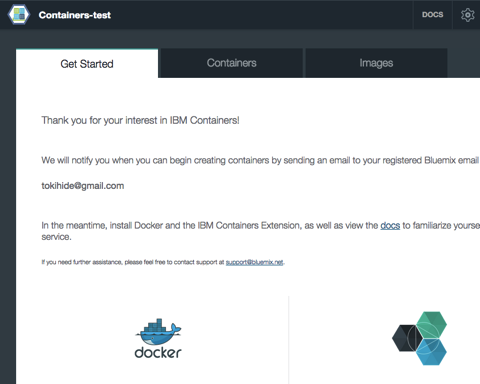
ドキュメントをその間に見ておくようにと書いてあるので見てみます。IBM Docker 環境を操作するために専用のツールIceコマンドを導入する必要があると記載されています。
ここではUbunt14.04を利用して作業をしてみます。
$ sudo apt-get install python-pip -y
$ sudo apt-get install docker.io
$ ln -s /usr/bin/docker.io /usr/local/bin/docker

$ sudo docker version
Client version: 1.2.0
Client API version: 1.14
Go version (client): go1.2.1
Git commit (client): fa7b24f
OS/Arch (client): linux/amd64
Server version: 1.2.0
Server API version: 1.14
Go version (server): go1.2.1
Git commit (server): fa7b24f
次に、IBM Container Extensionを導入します。
$ curl -O https://static-ice.ng.bluemix.net/icecli-1.0.zip
$ sudo pip install icecli-1.0.zip
Unpacking ./icecli-1.0.zip
  Running setup.py (path:/tmp/pip-v7N62r-build/setup.py) egg_info for package from file:///home/vagrant/icecli-1.0.zip

Requirement already satisfied (use --upgrade to upgrade): argparse in /usr/lib/python2.7 (from icecli==1.0)
Downloading/unpacking configparser (from icecli==1.0)
  Downloading configparser-3.3.0r2.tar.gz
  Running setup.py (path:/tmp/pip_build_root/configparser/setup.py) egg_info for package configparser

Requirement already satisfied (use --upgrade to upgrade): requests in /usr/lib/python2.7/dist-packages (from icecli==1.0)
Installing collected packages: configparser, icecli
  Running setup.py install for configparser
    deleting configparser.egg-info/requires.txt

  Running setup.py install for icecli

    Installing ice script to /usr/local/bin
Successfully installed configparser icecli
Cleaning up...
導入された icecliを実行してみます。
$ ice help
/home/vagrant/.ice/ice-cfg.ini does not exist ... using defaults
Target is container cloud. Invoking cloud service...
usage: ice [-h] [--cloud | --local]
           {login,ps,run,inspect,start,stop,restart,pause,unpause,rm,images,search,info,ip,help}
           ...

positional arguments:
  {login,ps,run,inspect,start,stop,restart,pause,unpause,rm,images,search,info,ip,help}
                        cloud commands, for specific command help follow the
                        command by -h, for local commands use 'docker -h'
    login               login to container cloud service
    ps                  list containers in container cloud
    run                 create and start container in container cloud
    inspect             inspect container details
    start               run existing container
    stop                stop running container
    restart             restart running container
    pause               pause existing container
    unpause             unpause existing container
    rm                  remove existing container
    images              list images registered in container cloud
    search              search image registry
    info                display system info
    ip                  manage floating-ips
    help                provide usage help for a specified command

optional arguments:
  -h, --help            show this help message and exit
  --cloud               command target is docker cloud service, default
  --local, -L           command target is local host docker engine
dockerコマンドのラッパーのような感じですね。
手順にしたがい ~/.ice/ice-cfg.ini を作成して中身を以下のようにします。
[DEFAULT]
docker_path = /usr/local/bin/docker
β版ということも有ると思いますが実際にDocker環境が利用できるようになるために2日程かかりました。実際に利用可能に成るとメールが通知されます。
最初にログインし、Serviceを確認すると自分のRepository名を決める画面が表示されます。
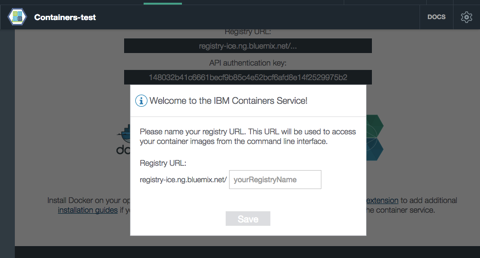
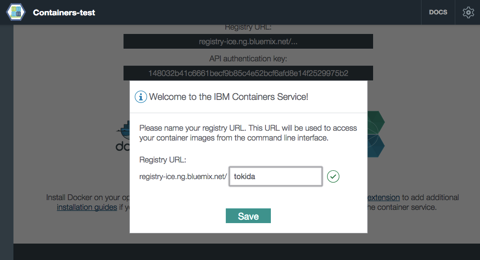
ここでは「tokida」として進めたいと思います。
このようにするとIBM Containerサービスを使うためのAPIキーが表示される画面になります。
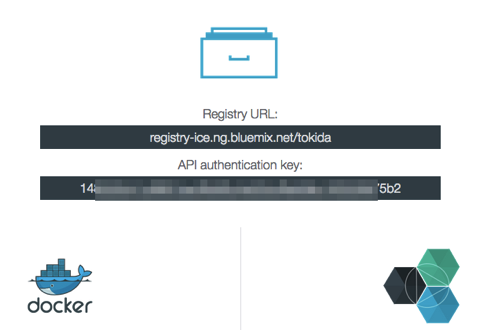
ここでのAPIキーを先ほどの ice ツールに登録をします。
agrant@vagrant-ubuntu-utopic-64:~$ sudo ice login -k 1**************************************2
Target is container cloud. Invoking cloud service...
Authentication with container cloud service completed successfully
Login Succeeded
ここまでで実際にIBM Containerを利用するための準備が出来ました。
IBM Container を使ってみよう
ICEツールはDockerコマンドをラッピングしているように動きます。ドキュメント上で ice --local というコマンドはほぼdockerコマンドと同等に動くように思われます。
基本的な仕組みとしては
- ローカルでDockerイメージの作成
- ICEツールを利用してBluemix環境にPush
- ICEツールを利用してDockerイメージを実行(run)
という事が出来ます。利用できるリソースはBluemixのコンソールからも確認できますしICEからも確認が出来ます
$ ice info
Target is container cloud. Invoking cloud service...
              Containers limit : 8
              Containers usage : 0
            Containers running : 0
             Memory limit (MB) : 2048
             Memory usage (MB) : 0
            Floating IPs limit : 2
            Floating IPs usage : 0
                  CCS host url : https://api-ice.ng.bluemix.net/v1.0/containers
                 Registry host : registry-ice.ng.bluemix.net
                    Debug mode : False
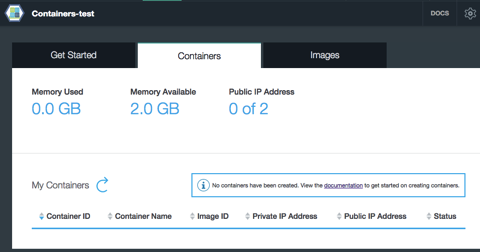
またアップデートされているImagesの管理は ice imagesで確認できます。
$ ice images
Target is container cloud. Invoking cloud service...
--------------------------------------------------------------------------------------------------------------------------
Image Id                                                                                   Image Name Created
--------------------------------------------------------------------------------------------------------------------------
015140b3-5d79-436c-8c36-38fa7232dfcc                   registry-ice.ng.bluemix.net/tokida/sshd:latest 2014-12-10T12:18:04Z
b679b48c-43d7-484e-b9b0-b2bf2baecc58                    registry-ice.ng.bluemix.net/ibmliberty:latest 2014-12-01T20:36:38Z
ac0c8eed-a201-4c22-8c6a-81691e4949e5                       registry-ice.ng.bluemix.net/ibmnode:latest 2014-12-01T20:36:28Z
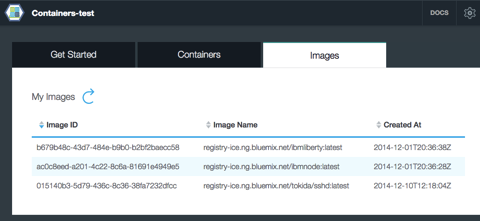
現時点では、Webコンソールから制御できる項目はなくすべてiceコマンドベースで作業を行うことになります。
iceのマニュアルは以下のリンクから参照可能です
- https://www.ng.bluemix.net/docs/#services/Containers/index.html
すこし触って幾つかICEの特徴を記載しておきます。
- Dockerizeされたアプリケーションは[CMD]で起動する必要がある
- コンテナにはグローバルアドレスを割り当てる事が出来る(必須?)
ice ip bind - ice –local で実行される内容は docker コマンドで実行されるものと同じ(のよう)
- docker のプライベートレポジトリとしても利用可能?(ice pull でローカルに取得可能、取得したImagesは dockerコマンドから利用できる)
- iceコマンドとdockerコマンドは同じ環境を見ている(ice –local iamgesとdocker imagesは同じ)
sshdが利用できるDockerコンテナを動かす
サンプルとしてよくあると思いますがここでもsshdをDockerizeして見たいと思います。
参考としてDocker社のサイトで用意されているDockerfileを実際に利用してみたいと思います。( https://docs.docker.com/examples/running_ssh_service/ )
# sshd
#
# VERSION               0.0.2

FROM ubuntu:14.04
MAINTAINER Sven Dowideit <SvenDowideit@docker.com>

RUN apt-get update && apt-get install -y openssh-server
RUN mkdir /var/run/sshd
RUN echo 'root:screencast' | chpasswd
RUN sed -i 's/PermitRootLogin without-password/PermitRootLogin yes/' /etc/ssh/sshd_config

# SSH login fix. Otherwise user is kicked off after login
RUN sed 's@sessions*requireds*pam_loginuid.so@session optional pam_loginuid.so@g' -i /etc/pam.d/sshd

ENV NOTVISIBLE "in users profile"
RUN echo "export VISIBLE=now" >> /etc/profile

EXPOSE 22
CMD ["/usr/sbin/sshd", "-D"]
ローカルの適当のディレクトリを作成し、上記の内容をDockerfileとして保管します。
Build
この辺りは完全にDockerコマンド同様になります。今回はsshdという名前で作りたいと思います。
$ sudo ice --local build -t sshd .
実行が終わるとImageが作成されています。
$ sudo ice --local images
Target is local host. Invoking docker with the given arguments...
REPOSITORY                                   TAG                 IMAGE ID            CREATED             VIRTUAL SIZE
sshd                                         latest              d4ffe604b5b9        28 seconds ago      254.9 MB
ローカルでの実行
実際にローカルで起動して見ます。
$ sudo ice --local run sshd
別の端末からログインしてみたいと思います。
$ sudo docker ps
CONTAINER ID        IMAGE               COMMAND               CREATED             STATUS              PORTS                   NAMES
7675402684cc        sshd:latest         "/usr/sbin/sshd -D"   28 seconds ago      Up 28 seconds       0.0.0.0:49155->22/tcp   goofy_goldstine
$ ssh root@localhost -p 49155
The authenticity of host '[localhost]:49155 ([127.0.0.1]:49155)' can't be established.
ECDSA key fingerprint is a7:d6:a9:8b:3f:f9:36:6b:b9:5d:24:fd:af:44:04:31.
Are you sure you want to continue connecting (yes/no)? yes
Warning: Permanently added '[localhost]:49155' (ECDSA) to the list of known hosts.
root@localhost's password:
Welcome to Ubuntu 14.04 LTS (GNU/Linux 3.2.0-54-generic x86_64)

 * Documentation:  https://help.ubuntu.com/

The programs included with the Ubuntu system are free software;
the exact distribution terms for each program are described in the
individual files in /usr/share/doc/*/copyright.

Ubuntu comes with ABSOLUTELY NO WARRANTY, to the extent permitted by
applicable law.

root@7675402684cc:~#
この辺りはDockerと同様で22ポートが49155にマッピングされていますのでsshで指定してログインしてみると通常のDocker同様に動いていることがわかります。
IBM Containerへのデプロイ
プライベートレポジトリなどの利用と同様にローカルのイメージに別名を付与します。今回は registry-ice.ng.bluemix.net/tokida/sshdとう名前をつけます。
$ sudo ice --local tag sshd  registry-ice.ng.bluemix.net/tokida/sshd
Target is local host. Invoking docker with the given arguments...
$ sudo ice --local images
Target is local host. Invoking docker with the given arguments...
REPOSITORY                                   TAG                 IMAGE ID            CREATED             VIRTUAL SIZE
sshd                                         latest              d4ffe604b5b9        6 minutes ago       254.9 MB
registry-ice.ng.bluemix.net/tokida/sshd      latest              d4ffe604b5b9        6 minutes ago       254.9 MB
次にこのイメージをPushしていきます。
$ sudo ice --local push registry-ice.ng.bluemix.net/tokida/sshd
$ sudo ice images
Target is container cloud. Invoking cloud service...
--------------------------------------------------------------------------------------------------------------------------
Image Id                                                                                   Image Name Created
--------------------------------------------------------------------------------------------------------------------------
a0219a81-6bcb-4aec-9b2a-81613f927973                   registry-ice.ng.bluemix.net/tokida/sshd:latest 2014-12-10T15:43:55Z
--------------------------------------------------------------------------------------------------------------------------
上記の用にレポジトリに配信されているのがわかります。
IBM Container上での実行
$ sudo ice run --name testsshd registry-ice.ng.bluemix.net/tokida/sshd
Target is container cloud. Invoking cloud service...
Created container Id: 90c8b1b6-9328-45fd-9d56-74b88a05dcf3
Warnings:
sshdとかは短すぎるのでだめと怒られるので --name で長めの名前を指定して実行しています。
$ sudo ice ps
Target is container cloud. Invoking cloud service...
--------------------------------------------------------------------------------------------------------------------------------
Container Id       Image Id           Command    Created      Status   Name       Private IP      Public IP       Priv/Pub Ports
--------------------------------------------------------------------------------------------------------------------------------
90c8b1b6-9328-45fd a0219a81-6bcb-4aec            Dec 10 15:52 Running  testsshd   172.16.1.180
-9d56-74b88a05dcf3 -9b2a-81613f927973
--------------------------------------------------------------------------------------------------------------------------------
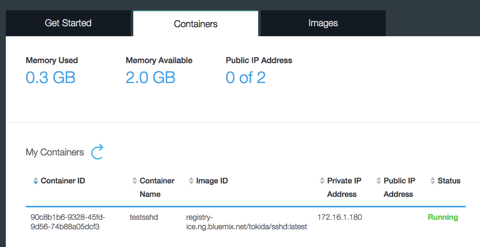
この時点で画面を確認するとPrivateIPが割あたっています。Dockerを普段ローカルで利用した場合には 172.17.x.xなので今回の172.16.x.xのため違う構造のネットワークであろうかと思います。このIPアドレス体系はBluemixアプリケーションからは通信できるのかまでは確認できていません。
IPアドレスの取得とバインド
外部から利用するためにIPを取得します。(以下の例ではすでに1つ利用している上で追加でRequestしています)
$ sudo ice ip request
$ sudo ice ip list
Target is container cloud. Invoking cloud service...
-----------------------------------------------------
Ip Address       Container Id
-----------------------------------------------------
129.x.x.1
129.x.x.2
-----------------------------------------------------
次にこのIPアドレスを実行しているイメージ(コンテナ)に対して割り当てます。
$ sudo ice ip bind 129.x.x.1 testsshd
Target is container cloud. Invoking cloud service...
Successfully bound ip
$ sudo ice ip list
Target is container cloud. Invoking cloud service...
-----------------------------------------------------
Ip Address       Container Id
-----------------------------------------------------
129.x.x.2
-----------------------------------------------------
$ sudo ice ps
Target is container cloud. Invoking cloud service...
--------------------------------------------------------------------------------------------------------------------------------
Container Id       Image Id           Command    Created      Status   Name       Private IP      Public IP       Priv/Pub Ports
--------------------------------------------------------------------------------------------------------------------------------
90c8b1b6-9328-45fd a0219a81-6bcb-4aec            Dec 10 15:52 Running  testsshd   172.16.1.180    129.x.x.1
-9d56-74b88a05dcf3 -9b2a-81613f927973
--------------------------------------------------------------------------------------------------------------------------------
$ sudo ice info
Target is container cloud. Invoking cloud service...
              Containers limit : 8
              Containers usage : 1
            Containers running : 1
             Memory limit (MB) : 2048
             Memory usage (MB) : 256
            Floating IPs limit : 2
            Floating IPs usage : 1
                  CCS host url : https://api-ice.ng.bluemix.net/v1.0/containers
                 Registry host : registry-ice.ng.bluemix.net
                    Debug mode : False
利用(bind)すると ip listからは消えるようです。そしてpsの結果ではPublicIPが表示されています。またinfoで確認するとFloating IPs usageが消費されている事がわかります。
$ ssh root@129.x.x.1
The authenticity of host '129.x.x.1 (129.x.x.1)' can't be established.
ECDSA key fingerprint is a7:d6:a9:8b:3f:f9:36:6b:b9:5d:24:fd:af:44:04:31.
Are you sure you want to continue connecting (yes/no)? yes
Warning: Permanently added '129.x.x.1' (ECDSA) to the list of known hosts.

root@129.x.x.1's password:
Welcome to Ubuntu 14.04 LTS (GNU/Linux 3.2.0-54-generic x86_64)

 * Documentation:  https://help.ubuntu.com/

The programs included with the Ubuntu system are free software;
the exact distribution terms for each program are described in the
individual files in /usr/share/doc/*/copyright.

Ubuntu comes with ABSOLUTELY NO WARRANTY, to the extent permitted by
applicable law.

root@instance-0000025a:~#
上記から、EXPOSESしたポートがグローバルIPにたいしてBINDされていることがわかりました。
root@instance-0000025a:~# apt-get update
0% [Connecting to archive.ubuntu.com]
0% [Connecting to archive.ubuntu.com]^C
root@instance-0000025a:~# ping www.google.com
コンテナから外部への通信が出来ていないきもします。逆向きの通信はSSHDでログインが可能であったことから利用できそうなのでこの辺りにはなにか制約が有るのかもしれません。
最後にinspectの情報を載せておきます。
$ sudo ice inspect  testsshd
Target is container cloud. Invoking cloud service...
{
    "Config": {
        "AttachStderr": "",
        "AttachStdin": "",
        "AttachStdout": "",
        "Cmd": [
            "date"
        ],
        "Dns": "",
        "Env": {},
        "Hostname": "",
        "Image": "registry-ice.ng.bluemix.net/tokida/sshd:latest",
        "Memory": 256,
        "MemorySwap": "",
        "OpenStdin": "",
        "PortSpecs": "",
        "StdinOnce": "",
        "Tty": "",
        "User": "",
        "VCPU": 1,
        "Volumes": [],
        "VolumesFrom": "",
        "WorkingDir": ""
    },
    "Created": "2014-12-10T15:52:06Z",
    "HostConfig": {
        "Binds": "null",
        "CapAdd": [],
        "CapDrop": [],
        "ContainerIDFile": "",
        "Links": [],
        "LxcConf": [],
        "PortBindings": {},
        "Privileged": "false",
        "PublishAllPorts": "false"
    },
    "HostId": "a595cc4b39b96ac82eb825a0e94757010332c76c47fc90c1d2a27909",
    "Human_id": "testsshd",
    "Id": "90c8b1b6-9328-45fd-9d56-74b88a05dcf3",
    "Image": "a0219a81-6bcb-4aec-9b2a-81613f927973",
    "Name": "testsshd",
    "NetworkSettings": {
        "Bridge": "",
        "Gateway": "",
        "IpAddress": "172.16.1.180",
        "IpPrefixLen": 0,
        "PortMapping": "null",
        "PublicIpAddress": "129.x.x.1"
    },
    "Path": "date",
    "ResolvConfPath": "/etc/resolv.conf",
    "State": {
        "ExitCode": "",
        "Ghost": "",
        "Pid": "",
        "Running": "true",
        "StartedAt": "",
        "Status": "Running"
    },
    "Volumes": []
}
IBM Containerでできる事
現時点で実際にできる事は、iceのオプション(‘login’, ‘ps’, ‘run’, ‘inspect’, ‘start’, ‘stop’, ‘restart’, ‘pause’, ‘unpause’, ‘rm’, ‘images’, ‘search’, ‘info’, ‘ip’)となります。
特徴的なのは
* runコマンドで Bluemix のアプリケーションにBind可能(まだ試してませんが)
というところでしょうか。
今後サポートされるのかと思いますがattachに代わるなにか、あとCommitがないのでどうやって実行しているコンテナを管理していくべきなのか、運用面ではlogsオプションも欲しいところですね。このIBM Containerは実際にどのコンテナがどの物理的なHWで動いているかはユーザは認識することが出来ません。これが実際に複数のマルチノードで動いているかは不明です(先日発表された内容ではDocker Orchestrationなどもサポートされるような形でしたがとくにiceコマンドとしてはまだ提供されていません)が今後色々進化していくものだと思っています。


