水津です。
このあいだMicrosoft Cognitive Servicesの勉強会に参加してきました。このMS Cognitive Services、IBM Watsonと同様に「認知」することができるAI系のサービスとなってます。また使い方も非常に簡単で、RESTでCALLするだけですぐに使えます。いわゆる学習(ML, DL)もされた状態で提供されているようで、学習の手間もないようです。(APIによって違うのかもしれませんが、少なくても勉強会で使用したEmotion APIは「学習」せずに使えました。)うん、素晴らしい!!!
ということで今回は、せっかく勉強会行ってきたので、その時の内容と似たことをBluemixのNode-REDから実行してみたいと思います。
目次
IBM Bluemix上のNode-REDからMS Cognitive Serviceを使う
作業の前に、、、
実施に際しMS Cognitive Servicesの準備が必要となりますので、以下Qiitaの記事を参考に準備ください。(本記事でも参照先Qiita記事同様にEmotion APIを使用いたします)
人工知能パーツ Microsoft Cognitive Services を使った表情分析アプリを作ろう![サブスクリプション準備編]:
http://qiita.com/annie/items/ba6392b7d1a7647adc4b
また今回は、勉強会で実施しました以下Qiita記事と似たようなことを実施しますので、内容について事前にご確認ください。
人工知能パーツ Microsoft Cognitive Services を使った表情分析アプリを作ろう! (Emotion API × JavaScript 編):
http://qiita.com/annie/items/96b37ef94885510c1b6b
Node-REDフローを作る
画像URL入力画面フローの作成
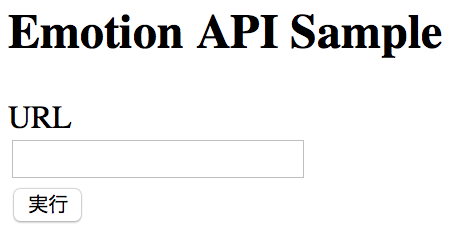
普通にForm入力の画面を作りましょう。フローは以下のようになります。

TemplateNode「画像URL入力画面」の中身は以下のように記入しましょう。
<h2>Emotion API Sample</h2>
<form action="/emotion" method="post">
    URL<br>
    <input type="text" name="url" value=""><br>
    <button type="submit">実行</button>
</form>
MS Emotion APIを呼び出し結果を表示するフローの作成
MS Emotion APIを呼び出し、その結果を少し加工し、結果表示する部分を作成します。作成するフローは以下のようになります。

MS Emotion APIでは、認証情報をHeaderに格納して呼び出す形となります。ですので、API Callする前にあるFunctionNode「Header追加」にて認証情報を付与しましょう。
msg.headers = {
    "Content-type": "application/json; charset=UTF-8",
    "Ocp-Apim-Subscription-Key": "認証キー"
};

msg.picurl = msg.payload.url;

return msg;
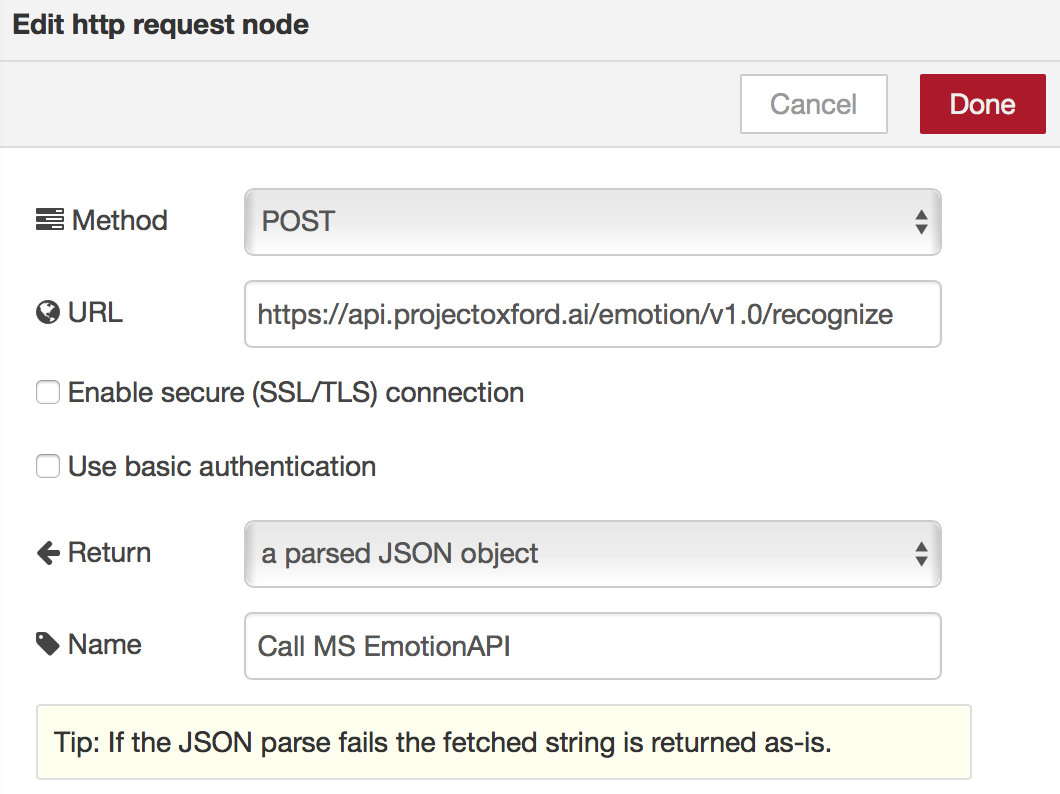
次に、MS Emotion APIの呼び出しとなります。HttpRequestNode「Call MS Emotion API」に以下設定をしましょう。
https://api.projectoxford.ai/emotion/v1.0/recognize

次に、API呼び出し結果を加工します。顔の位置と結果が配列で入ってますが、今回は配列最初の結果のみを使用します。FunctionNode「ResMsg作成」に以下コードを書きましょう。
//小数点6位までを残す関数 (表情スコアの丸めに利用)
function floatFormat( number ) {
    return Math.round( number * Math.pow( 10 , 6 ) ) / Math.pow( 10 , 6 ) ;
}

// Headerの書き換え
msg.headers = {
    "Content-type": "text/html; charset=UTF-8"
};

var result;

// payloadの中身を書き換え
if (msg.payload.length > 0) {
    var faceScore = msg.payload[0].scores;
    result = {
        'faceCount' : msg.payload.length,
        'faceAnger' : floatFormat(faceScore.anger),
        'faceContempt' :  floatFormat(faceScore.contempt),
        'faceDisgust' : floatFormat(faceScore.disgust),
        'faceFear' : floatFormat(faceScore.fear),
        'faceHappiness' : floatFormat(faceScore.happiness),
        'faceNeutral' : floatFormat(faceScore.neutral),
        'faceSadness' : floatFormat(faceScore.sadness),
        'faceSurprise' : floatFormat(faceScore.surprise)
    };
} else {
    result = {
        'faceCount' : msg.payload.length
    };
}

var mypayload = {
    'picurl' : msg.picurl,
    'result' : result
};
msg.payload = mypayload;

return msg;
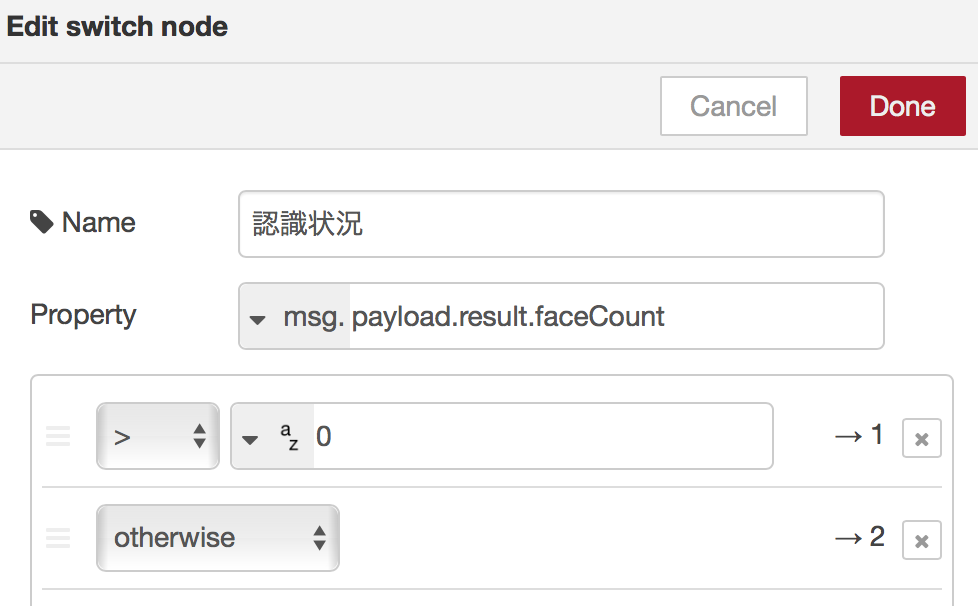
顔が認識できた場合とできなかった場合とで結果表示を変えたいので、SwichNode「認識状況」を以下のように設定し分岐しましょう。

最後に、結果表示画面を作成します。まずはTemplateNode「成功」を以下のように作成します。
<h2>Emotion API Sample</h2>
<form action="/emotion" method="post">
    URL<br>
    <input type="text" name="url" value=""><br>
    <button type="submit">実行</button>
</form>
<BR><BR>
<h2>結果</h2>

<table>
    <tr>
        <td>怒り</td>
        <td>{{payload.result.faceAnger}}</td>
    </tr>
    <tr>
        <td>軽蔑</td>
        <td>{{payload.result.faceContempt}}</td>
    </tr>
    <tr>
        <td>むかつき</td>
        <td>{{payload.result.faceDisgust}}</td>
    </tr>
    <tr>
        <td>恐れ</td>
        <td>{{payload.result.faceFear}}</td>
    </tr>
    <tr>
        <td>喜び</td>
        <td>{{payload.result.faceHappiness}}</td>
    </tr>
    <tr>
        <td>無表情</td>
        <td>{{payload.result.faceNeutral}}</td>
    </tr>
    <tr>
        <td>悲しみ</td>
        <td>{{payload.result.faceSadness}}</td>
    </tr>
    <tr>
        <td>驚き</td>
        <td>{{payload.result.faceSurprise}}</td>
    </tr>
</table>
<img src="{{payload.picurl}}">
TemplateNode「失敗」は以下のように作成しましょう。
<h2>Emotion API Sample</h2>
<form action="/emotion" method="post">
    URL<br>
    <input type="text" name="url" value=""><br>
    <button type="submit">実行</button>
</form>
<BR><BR>
<h2>結果</h2>
認識できませんでした。
<BR>
<img src="{{payload.picurl}}">
これで完成です!!
動作確認する
ブラウザで以下URLを開きます。
https://<作成したNodeREDのドメイン>/emotion

URLフィールドに何か画像のURLを入力してください。
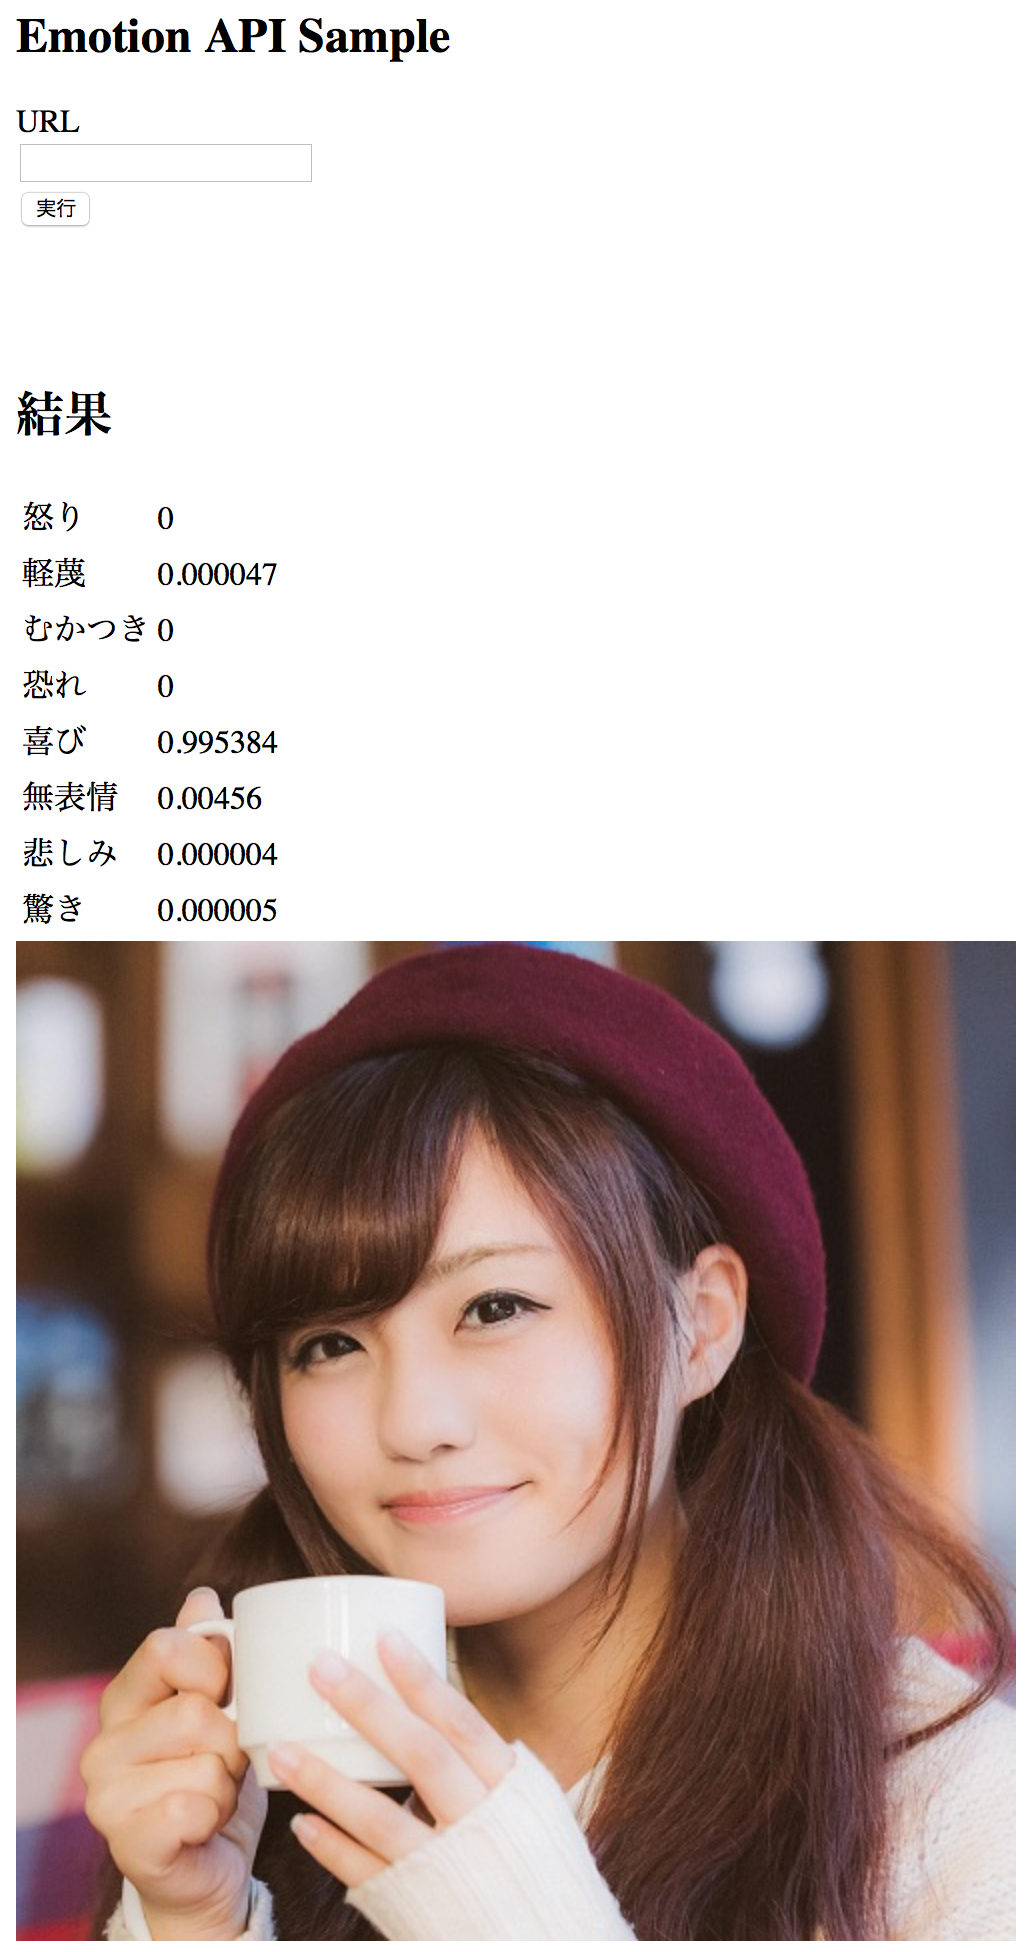
ここでは、勉強会で使用した画像を読み込ませてみたいと思います。こんな感じで、画像と結果が表示されれば完成です!!

今回作成したNode-REDフロー
エクスポートしたものを以下に添付しておきます。
[{"id":"50de7386.a33044","type":"http in","z":"53eb77bd.e2e328","name":"","url":"/emotion","method":"get","swaggerDoc":"","x":90,"y":80,"wires":[["fe17349a.1e3948"]]},{"id":"cd357bb6.bbb788","type":"http response","z":"53eb77bd.e2e328","name":"","x":430,"y":80,"wires":[]},{"id":"fe17349a.1e3948","type":"template","z":"53eb77bd.e2e328","name":"画像URL入力画面","field":"payload","fieldType":"msg","format":"handlebars","syntax":"mustache","template":"<h2>Emotion API Sample</h2>\n<form action=\"/emotion\" method=\"post\">\n URL<br>\n <input type=\"text\" name=\"url\" value=\"\"><br>\n <button type=\"submit\">実行</button>\n</form>\n","x":270,"y":80,"wires":[["cd357bb6.bbb788"]]},{"id":"f3a13f2c.ee4138","type":"http in","z":"53eb77bd.e2e328","name":"","url":"/emotion","method":"post","swaggerDoc":"","x":100,"y":200,"wires":[["e1338b1c.0a3768"]]},{"id":"43cf3395.3000b4","type":"http response","z":"53eb77bd.e2e328","name":"","x":1090,"y":200,"wires":[]},{"id":"e1338b1c.0a3768","type":"function","z":"53eb77bd.e2e328","name":"Header追加","func":"msg.headers = {\n \"Content-type\": \"application/json; charset=UTF-8\",\n \"Ocp-Apim-Subscription-Key\": \"認証情報\"\n};\n\nmsg.picurl = msg.payload.url;\n\nreturn msg;","outputs":1,"noerr":0,"x":270,"y":200,"wires":[["72646e22.c46fc8"]]},{"id":"72646e22.c46fc8","type":"http request","z":"53eb77bd.e2e328","name":"Call MS EmotionAPI","method":"POST","ret":"obj","url":"https://api.projectoxford.ai/emotion/v1.0/recognize","tls":"","x":460,"y":200,"wires":[["1957f58c.4ebada","942460a8.531a58"]]},{"id":"4445a9ff.c92e6","type":"template","z":"53eb77bd.e2e328","name":"成功","field":"payload","fieldType":"msg","format":"handlebars","syntax":"mustache","template":"<h2>Emotion API Sample</h2>\n<form action=\"/emotion\" method=\"post\">\n URL<br>\n <input type=\"text\" name=\"url\" value=\"\"><br>\n <button type=\"submit\">実行</button>\n</form>\n<BR><BR>\n<h2>結果</h2>\n\n<table>\n <tr>\n <td>怒り</td>\n <td>{{payload.result.faceAnger}}</td>\n </tr>\n <tr>\n <td>軽蔑</td>\n <td>{{payload.result.faceContempt}}</td>\n </tr>\n <tr>\n <td>むかつき</td>\n <td>{{payload.result.faceDisgust}}</td>\n </tr>\n <tr>\n <td>恐れ</td>\n <td>{{payload.result.faceFear}}</td>\n </tr>\n <tr>\n <td>喜び</td>\n <td>{{payload.result.faceHappiness}}</td>\n </tr>\n <tr>\n <td>無表情</td>\n <td>{{payload.result.faceNeutral}}</td>\n </tr>\n <tr>\n <td>悲しみ</td>\n <td>{{payload.result.faceSadness}}</td>\n </tr>\n <tr>\n <td>驚き</td>\n <td>{{payload.result.faceSurprise}}</td>\n </tr>\n</table>\n<img src=\"{{payload.picurl}}\">\n\n","x":950,"y":180,"wires":[["43cf3395.3000b4","1d7a4b78.f54a7d"]]},{"id":"1957f58c.4ebada","type":"debug","z":"53eb77bd.e2e328","name":"","active":false,"console":"false","complete":"true","x":630,"y":160,"wires":[]},{"id":"942460a8.531a58","type":"function","z":"53eb77bd.e2e328","name":"ResMsg作成","func":"//小数点6位までを残す関数 (表情スコアの丸めに利用)\nfunction floatFormat( number ) {\n return Math.round( number * Math.pow( 10 , 6 ) ) / Math.pow( 10 , 6 ) ;\n}\n\n// Headerの書き換え\nmsg.headers = {\n \"Content-type\": \"text/html; charset=UTF-8\"\n};\n\nvar result;\n\n// payloadの中身を書き換え\nif (msg.payload.length > 0) {\n var faceScore = msg.payload[0].scores;\n result = {\n 'faceCount' : msg.payload.length,\n 'faceAnger' : floatFormat(faceScore.anger),\n 'faceContempt' : floatFormat(faceScore.contempt),\n 'faceDisgust' : floatFormat(faceScore.disgust),\n 'faceFear' : floatFormat(faceScore.fear),\n 'faceHappiness' : floatFormat(faceScore.happiness),\n 'faceNeutral' : floatFormat(faceScore.neutral),\n 'faceSadness' : floatFormat(faceScore.sadness),\n 'faceSurprise' : floatFormat(faceScore.surprise)\n };\n} else {\n result = {\n 'faceCount' : msg.payload.length\n }; \n}\n\nvar mypayload = {\n 'picurl' : msg.picurl,\n 'result' : result\n};\nmsg.payload = mypayload;\n\nreturn msg;","outputs":1,"noerr":0,"x":650,"y":200,"wires":[["250538a8.3f78e8","e591d131.e69de8"]]},{"id":"250538a8.3f78e8","type":"debug","z":"53eb77bd.e2e328","name":"","active":false,"console":"false","complete":"true","x":790,"y":160,"wires":[]},{"id":"1d7a4b78.f54a7d","type":"debug","z":"53eb77bd.e2e328","name":"","active":false,"console":"false","complete":"payload","x":1110,"y":160,"wires":[]},{"id":"e591d131.e69de8","type":"switch","z":"53eb77bd.e2e328","name":"認識状況","property":"payload.result.faceCount","propertyType":"msg","rules":[{"t":"gt","v":"0","vt":"str"},{"t":"else"}],"checkall":"true","outputs":2,"x":800,"y":200,"wires":[["4445a9ff.c92e6"],["f92d3704.6d2fa"]]},{"id":"f92d3704.6d2fa","type":"template","z":"53eb77bd.e2e328","name":"失敗","field":"payload","fieldType":"msg","format":"handlebars","syntax":"mustache","template":"<h2>Emotion API Sample</h2>\n<form action=\"/emotion\" method=\"post\">\n URL<br>\n <input type=\"text\" name=\"url\" value=\"\"><br>\n <button type=\"submit\">実行</button>\n</form>\n<BR><BR>\n<h2>結果</h2>\n認識できませんでした。\n<BR>\n<img src=\"{{payload.picurl}}\">\n\n","x":950,"y":220,"wires":[["43cf3395.3000b4","1d7a4b78.f54a7d"]]}]
まとめ
いかがでしたでしょうか?
今回利用しましたMicrosoft Cognitive Servicesは、IBM Watson同様に敷居の低いAI系サービスとして提供されております。呼び出しもRESTで行えるため、IBM BluemixのようなMS以外の他のクラウド環境やアプリからでも簡単につかうことができます。
また、MS Cognitive Servicesでは、今回使用したEmotion APIに代表される画像系(MS Cognitive Serviceでは視覚としてますが)のみならず、言語、音声、検索、知識といった様々なサービスが提供されております。是非色々利用してみて下さい。


